






This guide explains how to register a new domain at Mudah Cloud. For some Indonesian extensions, the PANDI registry also asks for documents from the domain owner. You upload those documents after the domain is ordered and paid.
What you need
- A Mudah Cloud account with complete Account details (address and mobile number). These are used as the domain owner contact at the registry. Your account name and email are sent as well.
- Access to your account email, because the registry sends a confirmation email to that address.
- For extensions that need documents: clear scans or photos as PDF, not cropped, at most 1 MB per file. School papers need a visible stamp.
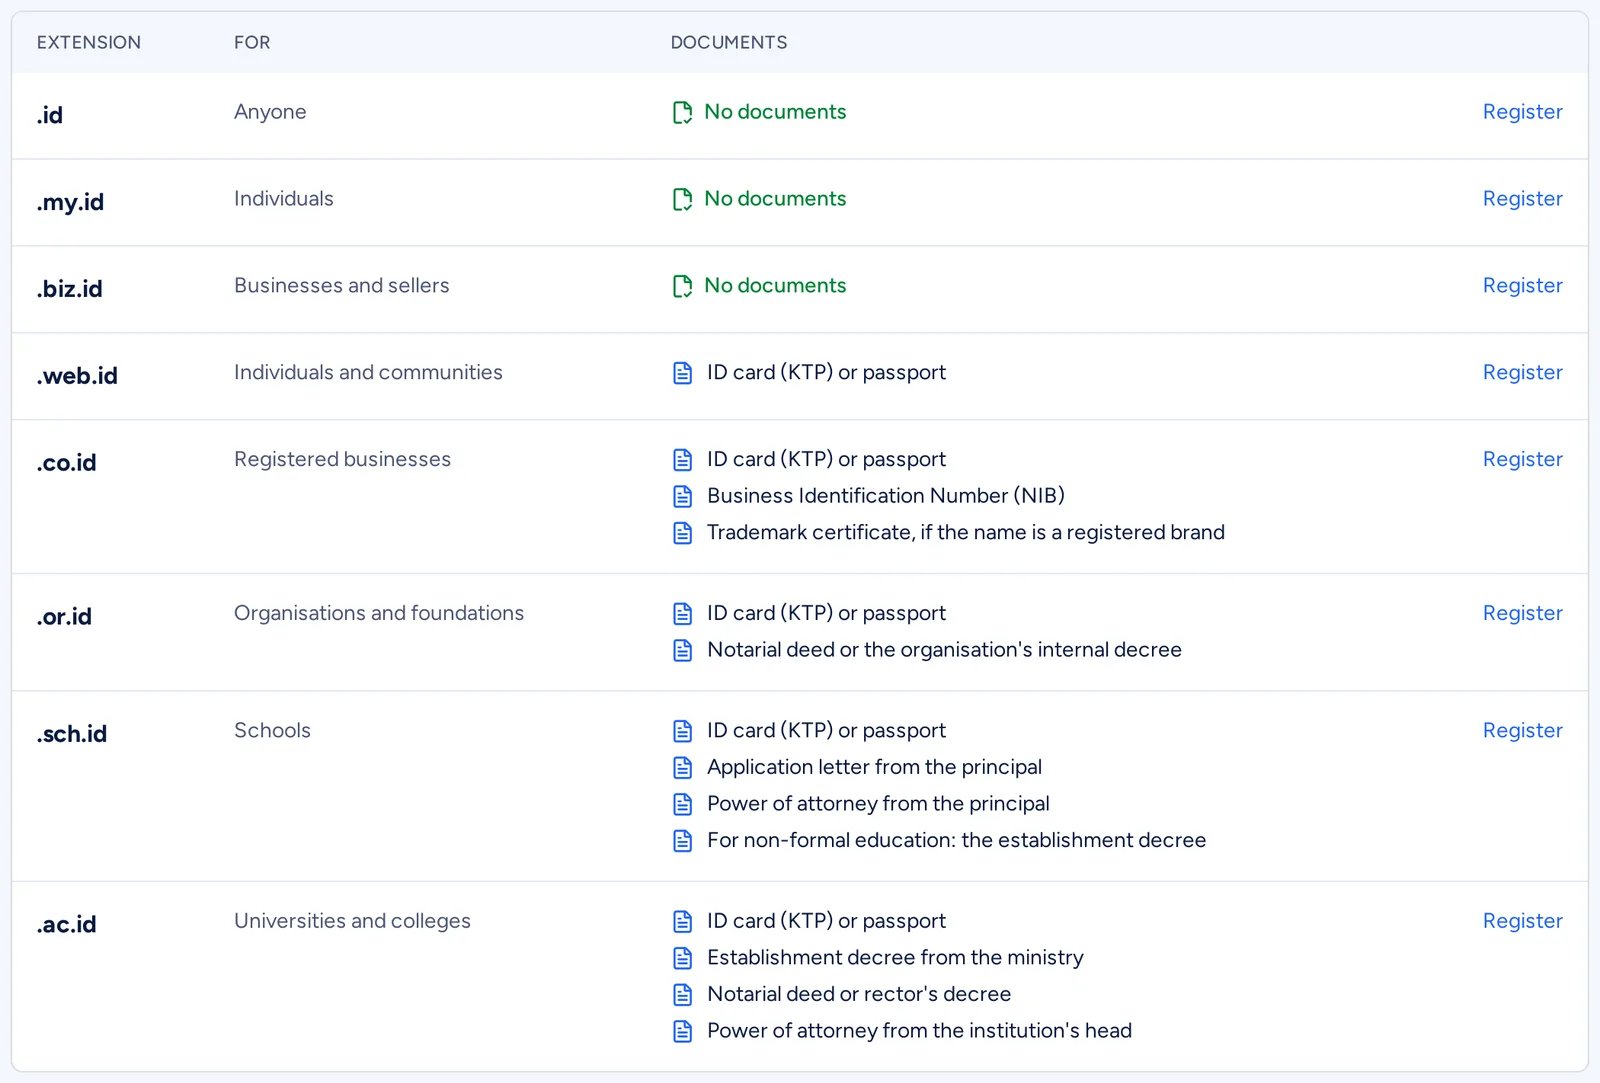
Extensions that need documents:
- .web.id: ID card (KTP) or passport.
- .co.id: ID card (KTP) or passport, Business Identification Number (NIB), and a trademark certificate if the name is a registered brand.
- .or.id: ID card (KTP) or passport, and a notarial deed or the organisation's internal decree.
- .sch.id: ID card (KTP) or passport, an application letter from the principal, a power of attorney from the principal, and for non-formal education the establishment decree.
- .ac.id: ID card (KTP) or passport, the establishment decree from the ministry, a notarial deed or rector's decree, and a power of attorney from the institution's head.
.id, .my.id and .biz.id need no documents. The full list is on the Indonesian domain requirements page. These rules are set by PANDI and can change.
Step 1: search for the domain name
- In the client area, open Services and then Domain Name, then click Register domain.
- Type the name without the extension, pick the extension, then click Check and order.
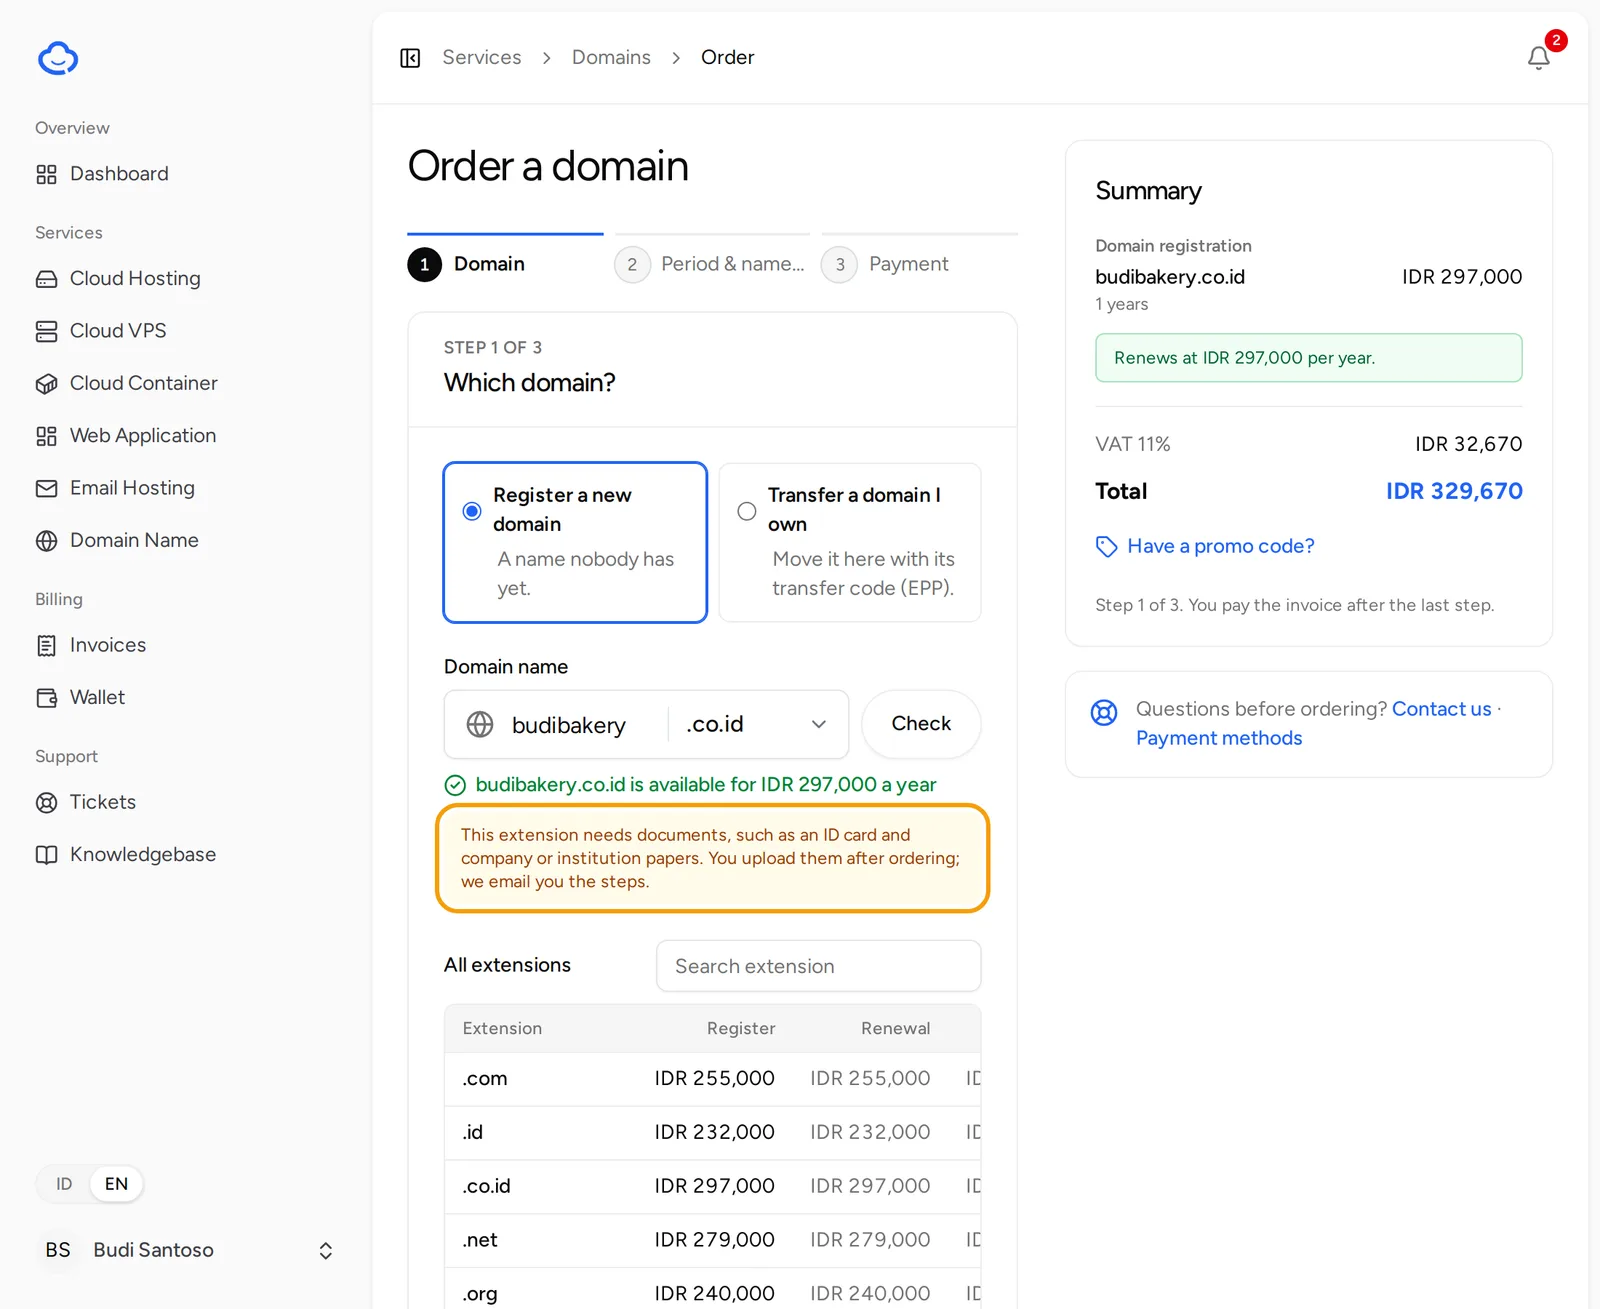
- On the Order a domain page, make sure Register a new domain is selected. Check the Domain name and extension, and click Check if needed.
- If the name is free, a green message shows its price. If the extension needs documents, a yellow note also says you upload them after ordering.
- Click Continue.
Step 2: choose the period and nameservers
- Under Period, choose how many years to register the domain for.
- Under Nameservers, choose Use our nameservers if you want to manage DNS records from the client area. Choose Use my own nameservers if your DNS or hosting is elsewhere, then enter two to four nameservers.
- Click Continue.
You can change the nameservers later from the domain's service page.
Step 3: complete your details and pay
- If your Account details are not complete yet, fill in the Registrant address section: Account type (Personal or Company), address, city, province, postal code, country and Mobile number. These are saved to your account for next time.
- Choose a payment method.
- Tick the Terms of Service checkbox, then click Continue to payment.
- Pay the invoice that opens. See the guide on paying an invoice if needed.
Once the invoice is paid, the domain is registered at the registrar automatically. You get an email when the domain is active.
Step 4: upload the documents
- Open Services and then Domain Name, then click your domain.
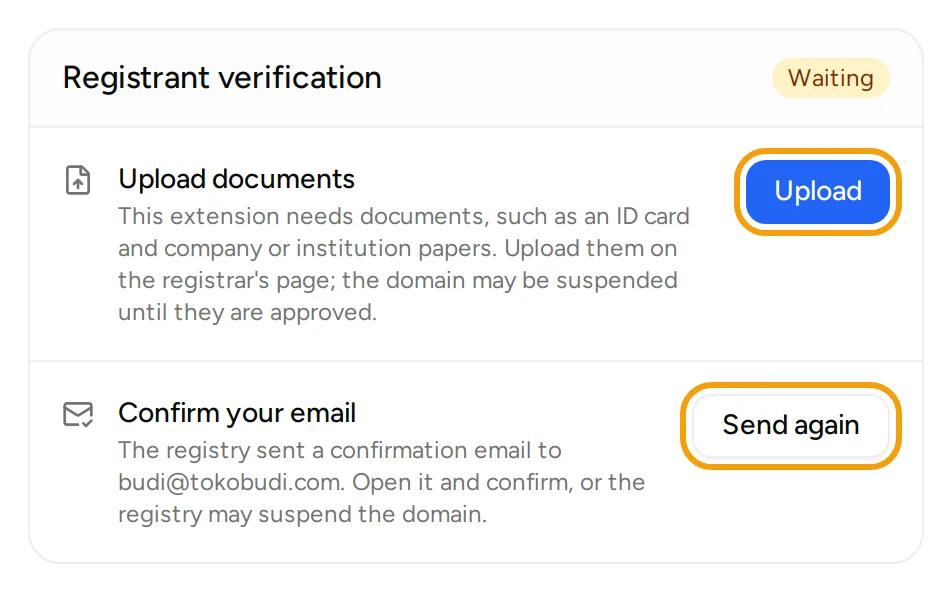
- On the Overview tab, find the Registrant verification card.
- In the Upload documents row, click Upload. The registrar's upload page opens in a new tab. The link is made just for you when you click the button.
- Upload every document your extension needs, then submit.
Step 5: confirm the domain owner's email
The registry sends a confirmation email to your account email. This applies to .id domains, including those that need no documents.
- Open the email from the registry and click the confirmation link. Do this within 30 days, or the domain may be suspended.
- If the email is missing, click Send again in the Confirm your email row.
After you upload the documents
- The registry checks the documents within 1 to 3 working days. The check status shows in the top right corner of the card, for example Waiting.
- The registry may suspend the domain until the documents are approved.
- The status is refreshed when you open the domain page and every night. Once the registry has verified the domain, the Registrant verification card no longer shows and there is nothing else to do.
Troubleshooting
- Upload shows a message that the upload page is not available right now: try again a few minutes later.
- The documents are rejected: check that the files are clear, not cropped, PDF, and no larger than 1 MB, then upload them again.
- The confirmation email does not arrive: check your spam folder, then click Send again.
Open Support and then Tickets, click New ticket, and choose the Technical support department. Mention your domain name.