






This guide is for when you already have a website's files and database, for example from your old host or your own computer. The steps are the same in cPanel and DirectAdmin; only the menu names differ a little.
Moving from another host and would rather not do it yourself? Migration is free. Open a ticket after ordering and our team moves your site and email at no charge.
What you need
- A Cloud Hosting service that is active.
- The website files in a single
.zipfile. Compress all the files first so the upload is faster. - The database as a
.sqlfile (exported from phpMyAdmin at your old host), if the site uses one.
Step 1: sign in to the control panel
- Sign in to the client area.
- In the sidebar, open Services and then Cloud Hosting, then click Manage on your service.
- In the Manage section, click Open cPanel (or Open DirectAdmin).
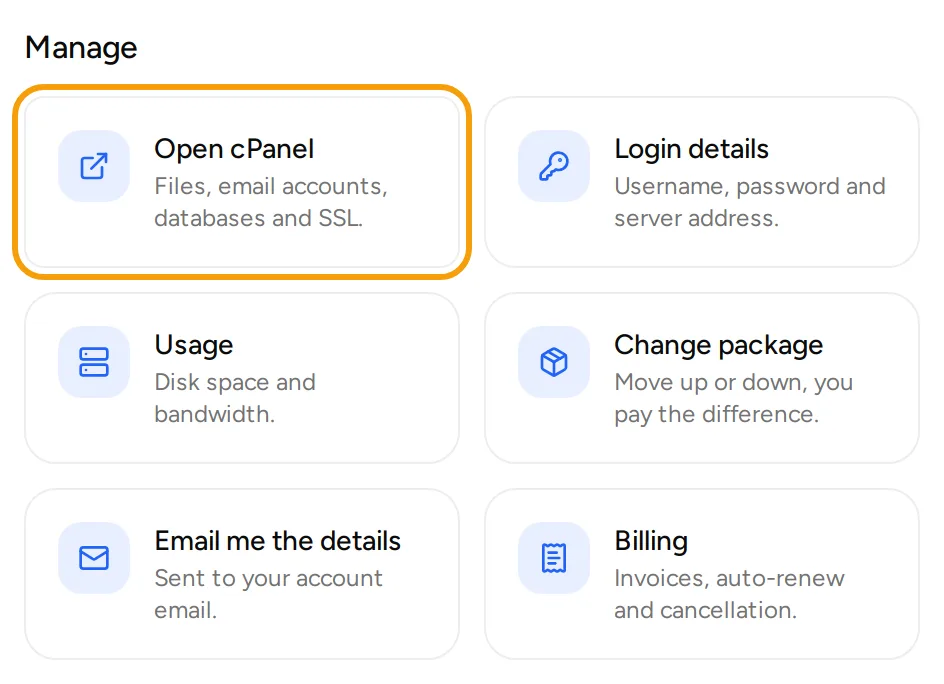
Before uploading, check the Usage tab to make sure there is enough Disk space left for your files and database.
Step 2: upload the files with File Manager
- In the panel, open File Manager.
- Go into the
public_htmlfolder. This folder holds the website for the main domain. - If there are default files such as
index.htmlordefault.htmlthat you do not need, delete them. - Click Upload and choose your website's
.zipfile. Wait until the upload finishes. - Back in
public_html, right-click the.zipfile and choose Extract. - Make sure files like
index.phporindex.htmlsit directly insidepublic_html, not in a subfolder. If they are in a subfolder, move its contents up intopublic_html. - Delete the
.zipfile after extracting so it does not use disk space.
Step 3 (optional): upload with FTP
For large sites or many files, FTP is often easier.
- In the panel, open FTP Accounts (cPanel) or FTP Management (DirectAdmin), and create an FTP account with a password.
- Open an FTP app such as FileZilla and enter:
- Host: the server name from the Panel address on the Access tab, without
https://and the port, for exampleserv04.awandns.com. Once the domain points to the hosting, you can also use the domain name. - Port:
21. - Username: the full FTP account name, usually in the form
name@yourdomain.com. - Password: the FTP account password you set.
- Host: the server name from the Panel address on the Access tab, without
- Upload the files into the
public_htmlfolder.
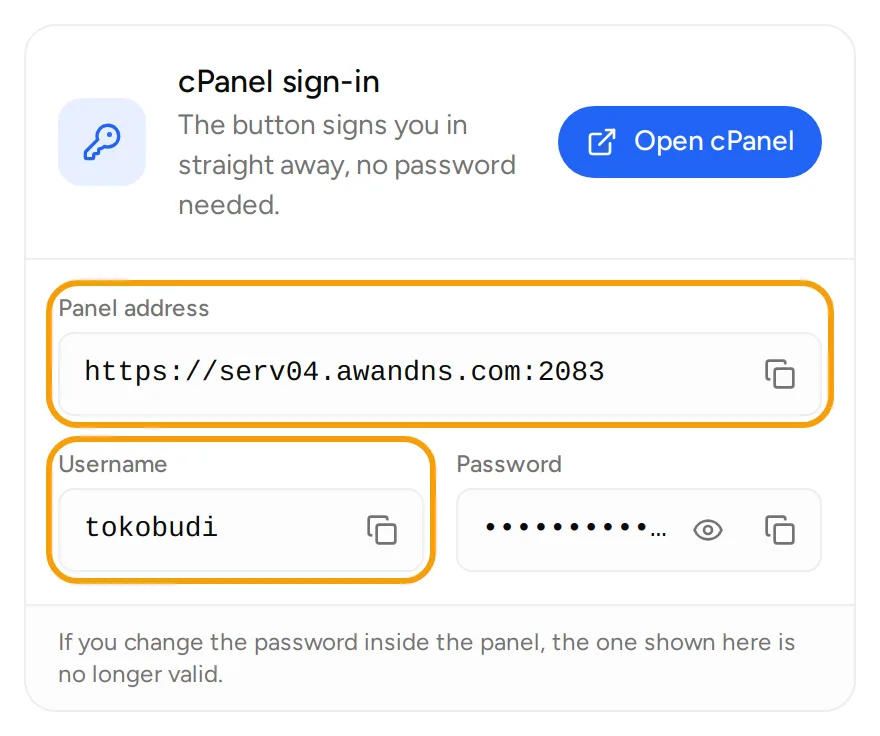
The main hosting account (the username on the Access tab) can usually be used for FTP too and has access to every folder.
Step 4: create a database and user
- In cPanel, open MySQL Database Wizard. In DirectAdmin, open MySQL Management and create a new database.
- Enter a database name. The panel puts the hosting account username in front of it, for example
tokobudi_shop. - Create a database user with a strong password. Write down the database name, user name and password.
- Give that user all privileges (All Privileges) on the database.
Step 5: import the .sql file in phpMyAdmin
- In the panel, open phpMyAdmin.
- In the list on the left, click the database you just created.
- Open the Import tab, click Choose File and pick your
.sqlfile. - Click Import (or Go) at the bottom. Wait for the success message.
If the database file is very large and the import fails, compress it to .sql.gz and try again, or open a ticket for help.
Step 6: update the site's config
The site needs the new database name, user and password. Where they live depends on the app:
- WordPress: the
wp-config.phpfile, atDB_NAME,DB_USERandDB_PASSWORD.DB_HOSTusually stayslocalhost. - Laravel: the
.envfile, atDB_DATABASE,DB_USERNAMEandDB_PASSWORD. - Other apps: look for a config file such as
config.phporconfiguration.php.
Open the file with Edit in File Manager, change the values and save. If the site's address changes, for example from an old domain to a new one, update the site address in the app's config or database too.
Troubleshooting
- "Error establishing a database connection": the database name, user or password in the config does not match what you created in step 4. Also check the user has privileges on the database.
- The site still shows a default page: the default
index.htmlis still inpublic_html, or the site files are in a subfolder. - The site does not open on the domain yet: the domain does not point to the hosting. See Point a domain to your hosting.
- FTP login fails: make sure the username includes
@yourdomain.comand the port is21.
For other help or a free migration request, open Support and then Tickets, click New ticket, choose Technical support and pick your hosting service.